Window farm: Lesson plan
Starting their own seeds, and seeing what is happening as the seeds germinate, is a fun way for young students to begin learning how seeds become plants. It’s also the first step in learning about where food comes from and the importance of agriculture.
In this lesson, students become young scientists as they apply the scientific research process to monitor their seeds’ progress as we start seeds in a unique window farm.
Note: The following content has been written so you can use it easily in your teaching slides.
Curriculum Relevance
Transferable skills across the Ontario curriculum:
Critical thinking and problem solving; innovation, creativity; collaboration; sustainability; and communication.
Grade 2 Science and Technology
A. STEM Skills and Connections
A1. STEM Investigation and Communication Skills
A1.1 use a scientific research process and associated skills to conduct investigations
A1.5 communicate their findings, using science and technology vocabulary and formats
E. Earth and Space Systems: Air and Water in the Environment
E2. Exploring and Understanding Concepts
E2.4 identify the three states of water in the environment, and describe how temperature changes affect the state of water within the water cycle
Preparing for the lesson:
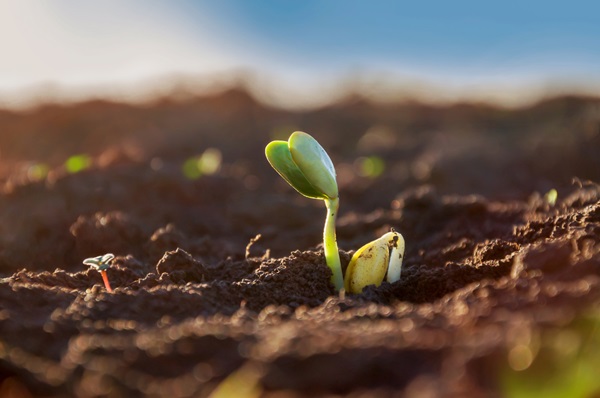
In this lesson, students will see the seeds sprout fairly quickly and then measure and report their progress. An exciting part of the process is seeing the seed actually begin to send out roots and a tiny shoot. Students may be surprised to learn that germination does not require soil—you can germinate a seed on wet paper towel.

Seeds germinate when they have the right combination of temperature, moisture, and oxygen. Until those conditions exist, seeds are dormant. Seeds have photoreceptors that allow them to detect light and dark; some seeds need light to germinate, while others do not. Water triggers a biochemical process that interrupts seed dormancy and allows the embryo inside the seed to begin to germinate.
Seeds are covered by an outer covering called the seed coat. The developing roots have to break through the seed coat. For some seed types, such as soybeans and peas, soaking them for several hours speeds up germination by making the seed coat easier to break through.
Roots emerge first, before shoots. The root anchors the plant and absorbs nutrients. As the plant gets bigger, it will need more nutrients than are available from the moist environment of your students’ window gardens. But it is quite amazing how far shoots will grow before they need soil nutrients.
Note to students that the moisture level in the baggie can be compared to water in its liquid or gaseous state, reminding them that plants cannot grow when liquid is in its solid state.
You may wish to begin the lesson by showing students this time lapse video of seeds sprouting and growing.
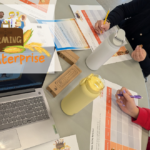
You will need:
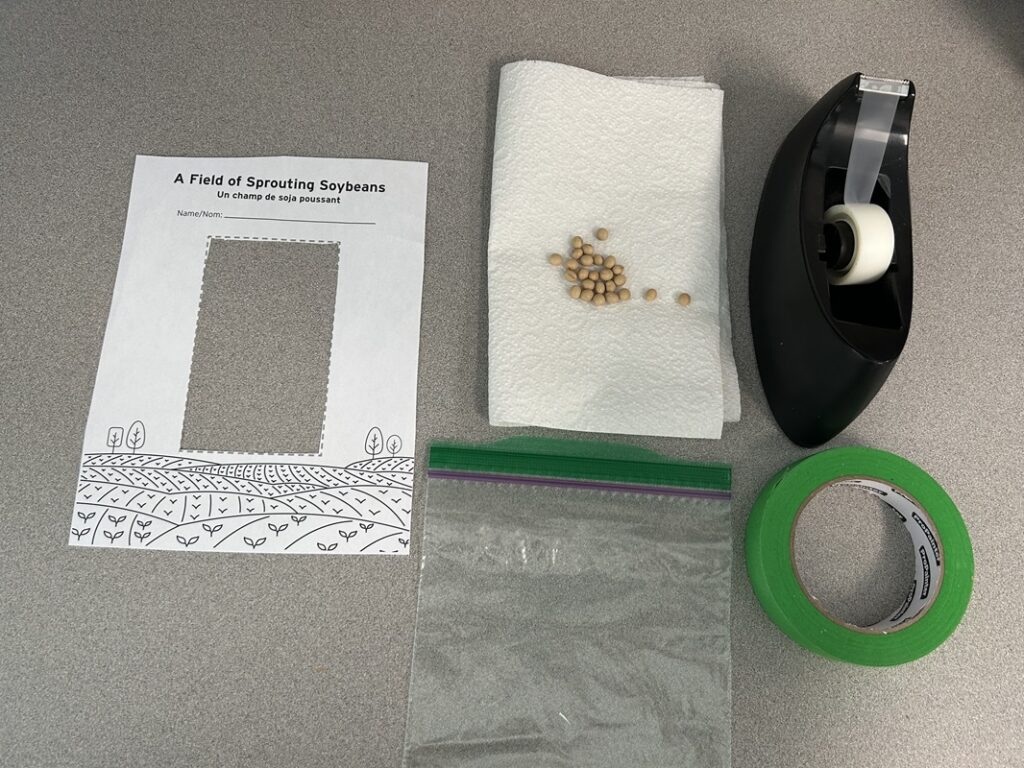
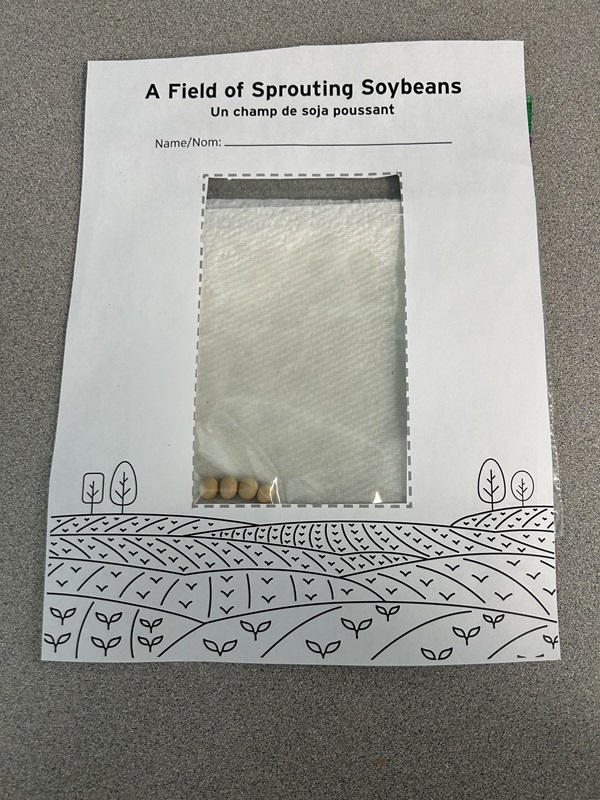
- Good in Every Grain Seed-Starting Window Farm Classroom Kit*, which includes:
- 30 soybean seeds
- 30 clear plastic baggies (Ziplock or other resealable brand.)
- 30 farmers-field window templates**
- a class set of rulers and pencils to use for growth measurement.
- Bowl or jar for soaking seeds overnight before beginning the lesson. Drain the seeds before distributing them for “planting.”
- Paper towel
- Spray bottle for moistening paper towel
- Students will need a science notebook or record sheet to record their seeds’ progress
*If you are unable to get a classroom kit, you can do the lesson with any fast-sprouting seeds, such as soybeans or peas, radishes, chives, and alfalfa. But note that soybeans are referenced in the lesson.
** Looking for a window template idea? Here is a great example from Playdough to Plato.
LESSON IDEAS
Minds ON!
Did you know the soybeans seeds you are going to plant are a type of grain? They are grown right here in Ontario. Soybeans are grown as food for humans and farm animals. But we make lots of things from soybeans!
Look around the classroom or think about your house and guess the things that are made from soybeans!
Are you surprised to know soybeans are used to make crayons? It’s true! One acre (the size of 2.5 hockey rinks) of soybeans makes more than 80,000 crayons!
These are some other things made from soybeans:


Lesson content:
Introduction
We are going to grow seeds in our classroom to investigate how they begin to grow. We will do this investigation like scientists, using the scientific research process. We will watch our seeds and record how quickly they sprout and how they grow.
This time lapse video shows seeds sprouting and growing:
Perhaps you have planted seeds already, but have you done it in a mini-greenhouse?
A greenhouse is a building made of glass where plants can be protected from cold weather. The glass lets in the light plants need to grow. Sunlight keeps it warm. A greenhouse also holds in the moisture that plants need.
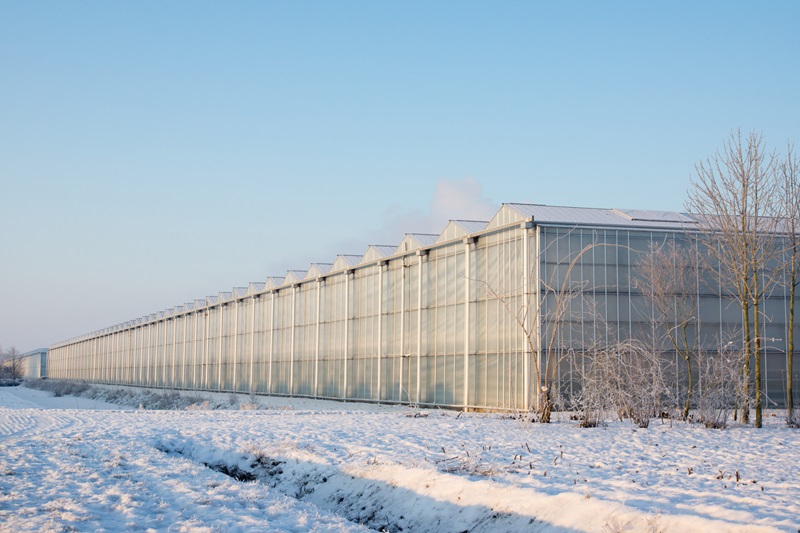
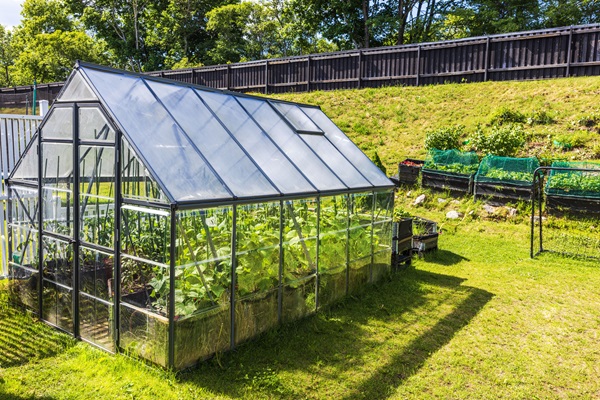
We will not build an actual greenhouse. But we will try to create the conditions inside a greenhouse with plastic baggies and paper towels!
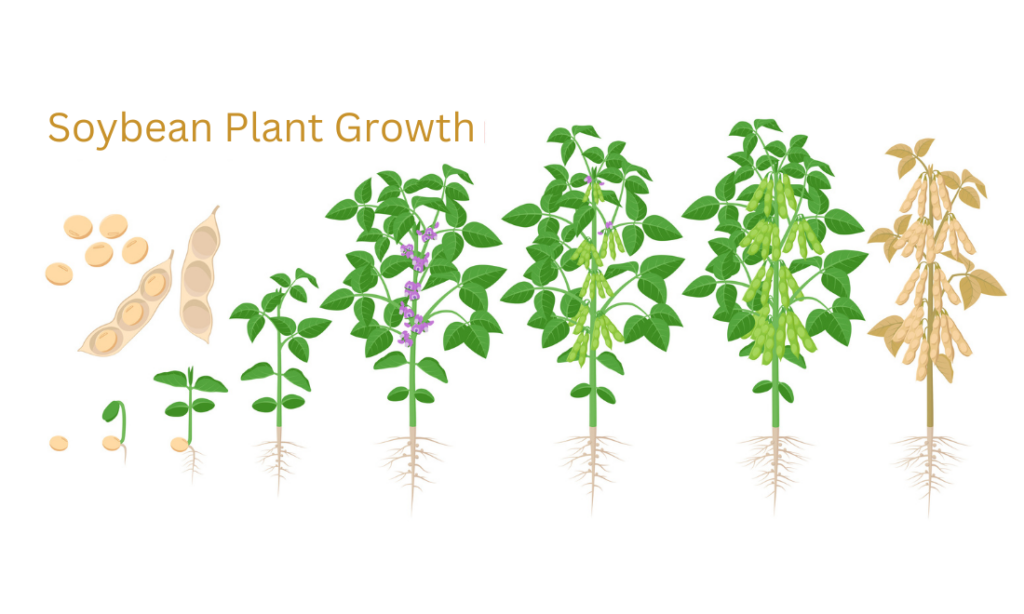
Seeds have a covering called the seed coat. There is a tiny plant inside the seed called an embryo. Its tiny roots are ready to grow. When the seed has moisture, the seed senses it. The seed germinates, or begins to grow. Before the seed germinates, it is dormant. It is like the seed is asleep.
First, roots begin to sprout. They have to break through the seed coat. When that happens, you will begin to see the roots sprouting. Next, you will see the shoot begin to break out of the seed and start to grow up toward the light.
The shoot gets its food from the inside of the seed. The inside part is called the endosperm. It is full of nutrients that the new plant needs until its leaves can get sunlight.
This video illustrates how a seed becomes a plant (3:46):
We are going to grow a few seeds but imagine how many seeds a farmer grows! And inside each seed in the farmer’s field, the exact same thing happens that you will see in your own seeds.
Let’s start growing!
Step 1
Form your hypothesis.
Discuss: How long do you think it will take for our seeds to sprout?
When we talk about this, we are creating our hypothesis. A hypothesis is the starting point of our investigation. First, we ask a question about something we want to study and what we think the answer will be. We will write down our hypothesis and look at it later to see if we have proven it.
Write down your hypothesis. Say how long you think it will take the seeds to germinate. Will it be hours, days, weeks?
At the end of your investigation, you will make a conclusion about how long it took the seeds to sprout. You can also note other observations in your conclusion, such as whether or not a baggie is a good greenhouse.
Step 2
Plant your seeds
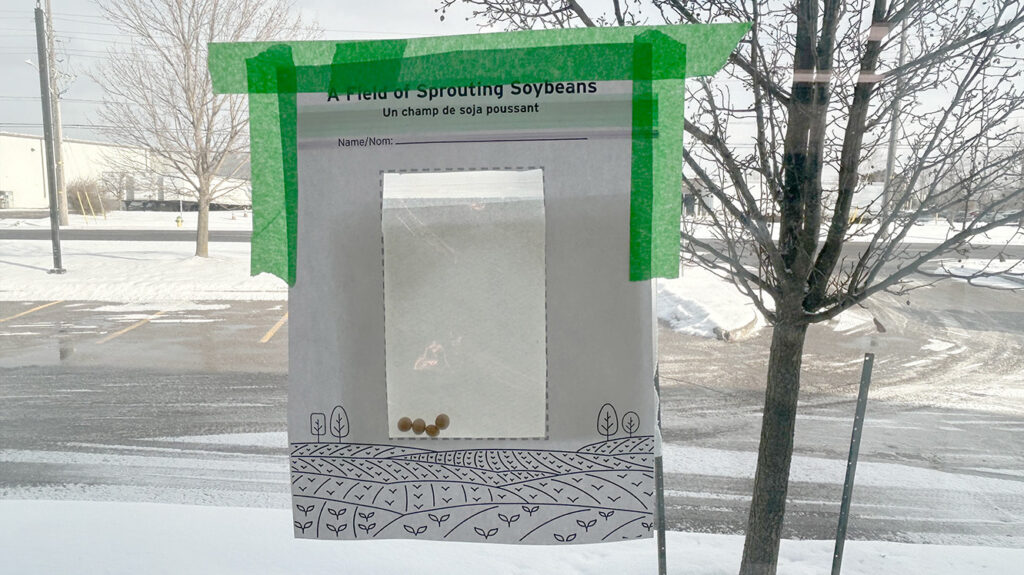
Your teacher will give you a “window frame,” plastic baggie, and piece of paper towel.
- Lightly dampen a paper towel by spraying it with water. Fold it and put it in your baggie.
- Put your seeds in the baggie and press them gently against the paper towel.
- Seal the baggie tightly. Put your window frame face down on your desk. Tape the baggie to the frame with the beans showing on the picture side of the frame. When you turn it over, you will see the beans and the picture side of the frame.
- Tape the frame to the window with the beans facing inside the classroom so you can see them.
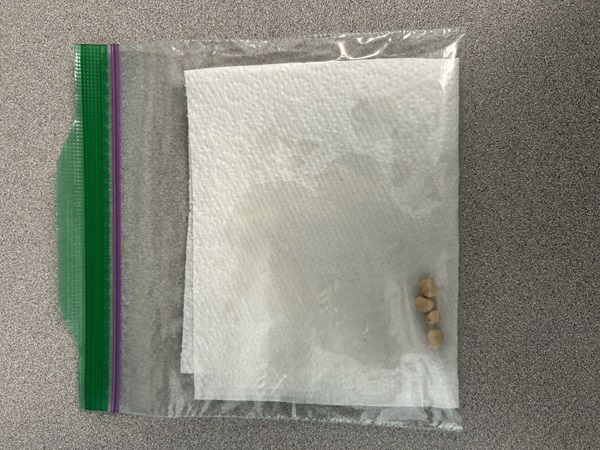
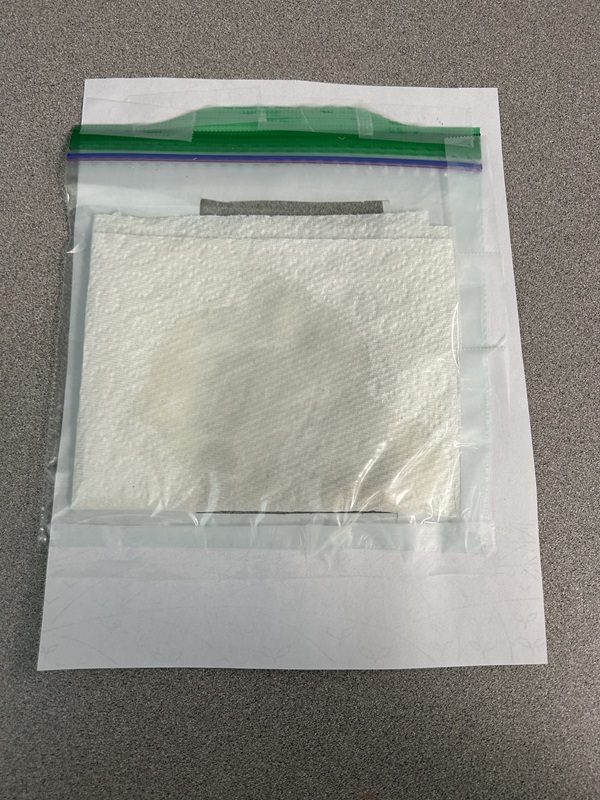
Write: Write the date you planted the seeds in your notebook or record sheet. This is Day 1.
Step 3
Observe your seeds: Day 2
Is anything happening yet? You can expect to see your seeds beginning to sprout in 3 to 7 days.
Record: Make a note in your record of everything that can help your seed grow.
Step 4
Observe your seeds: each day
Measure the roots and the shoots. Record what is happening. You can write what you see or draw pictures to show how many leaves there are. If your shoots get to the top of the baggie, open the top a little to let it grow outside.
Each day check the weather by looking through the window frame.
- Is the baggie a little wet inside? A lot wet? Seeds need moisture.
- Is it sunny outside? Seeds need sun.
- Is it cold against the window? Seeds need warmth.
- If it is sunny outside and the window is warm, is there more or less moisture in the baggie than when you first planted the seeds?
Notice: Are the seeds doing better with a lot of water or a little?
- Is the moisture in the liquid state, like raindrops on inside of the baggie?
- Is the moisture in the gaseous state, like fog?
- Is the moisture in the solid state of water? Uh oh!
Remember: Look at your hypothesis.
- Did your seeds sprout as quickly as you thought they would?
Step 5
Conclusion
After 2 weeks, think about what has happened inside the baggie and make a conclusion about what has happened. Did the seeds germinate when you thought they would? Is that because of the right conditions? Is a baggie a good greenhouse?
Extension activities:
- Place one bag of soybeans in a dark closet. Compare the soybeans to the ones hanging in the window.
- Carefully plant some of the sprouted seeds in pots of soil (it may help to use tweezers to pick up the seed and place it in a pot). Continue the record keeping.
Fun video: Life of a U.S Soybean (2:12)
Watch this great animated video on the life of a U.S soybean seed and plant.
Vocabulary
- dormant – not growing for a period of time
- embryo – the tiny plant inside a seed that will grow when conditions are right
- endosperm – the inside part of the seed that has nutrients for the growing plant before the shoot gets sunlight
- germinate – when a seed begins to grow and put out roots and shoots
- hypothesis – the starting point of our investigation
- seed coat – outer covering of a seed
- shoot – the part of the plant above the soil. It includes the stem, leaves, buds, flowers, and fruit
- sprout – when a plant begins to grow.
Action!
Wrap-up:
Have students work in groups to review their seed records.
- Did everyone’s seeds grow the same?
- What was different?
Have students in their groups or individually create a poster or one-page report of their seed growth. Display the results in the classroom.