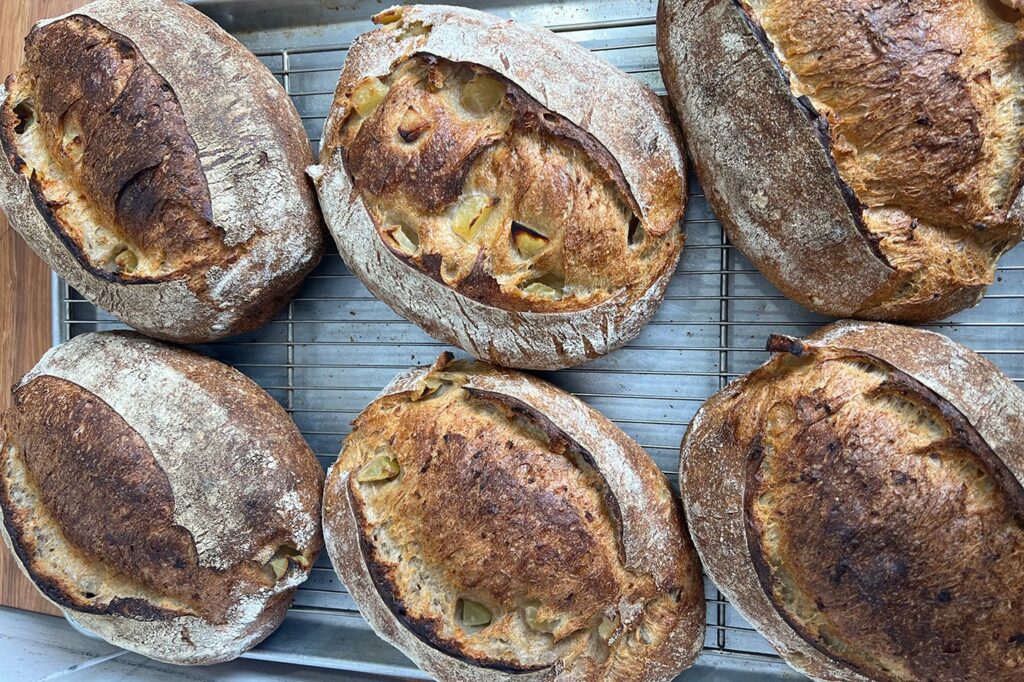
Oat porridge sourdough with honey and apple
Courtesy of Chef Matthew James Duffy
It is recommended to measure this recipe using grams in order to create a successful sourdough loaf.
Yield: Makes 2 x 900g loaves
Prep time: 8 hours and 30 minutes
Cook time: 40 minutes
Ingredients:
For the levain:
- 29g (2 tbsp) Bread flour
- 7g (1½ tsp) Rye flour
- 37g (2½ tbsp) Water
- 37g (2½ tbsp) Levain
For the porridge:
- 44g (¼ cup + 2 tbsp) Ontario oats
- 134g (½ cup + 2 tbsp) Water
- 20g (1½ tbsp) Brown butter
- 2g (⅓ tsp) Salt
- 28g (2 tbsp) Honey
Final dough:
- 551g (5 cups) Bread flour
- 147g (1¼ cup) Whole wheat flour
- 37g (2½ tbsp) Rye flour
- 184g (approx 1 medium apple) Honey crisp apples (peeled and cubed)
- 529g (2¼ cups) Water 1
- 44g (3 tbsp) Water 2
- 15g (1 tbsp) Salt
- 184g (2 cups) Oat porridge
- 110g (½ cup + 1½ tbsp) Levain
Directions:
Levain:
- Mix all ingredients until well incorporated with Desired Dough Temperature of 28°C / 82.4°F.
- Allow to ferment 4 hours at room temperature (21°C / 70°F).
Porridge:
- Add the honey to a heavy-bottomed pot and place over medium heat.
- Allow the honey to bubble and darken in colour then add the water, salt and oats. Cook the porridge until thick enough to hold up a wooden spoon.
- Take the porridge off the heat and add the brown butter.
Note: It is very important to cook the porridge until it is VERY thick and the majority of water has evaporated.
Final dough:
- Autolyse – Add the flour and water 1 together and mix until there are no dry bits. Let rest for 30-60 minutes.
- Autolyse is a technique used in bread making where flour and water are mixed together and allowed to rest before adding other ingredients. This resting period hydrates the flour, kick-starting gluten formation and enzyme activity, resulting in improved dough texture and flavour development.
- Mixing – Hand mix or machine. Start by adding the levain to the dough and mix until fully combined (about 5 min). Add the salt and mix until fully incorporated (about 4-5 min). Slowly add the water 2 in 3 additions, waiting until fully absorbed between additions. Mix the porridge into the dough on medium to high speed allowing it to mix evenly through the dough. Turn the mixer to 1st speed and add the apples.
- Desired Dough Temperature (the ideal temperature for the dough after mixing) – 78-80°F / 27-28°C.
- Bulk fermentation – Allow the dough to rise at room temperature for 3 hours. Give the dough 1-2 folds in the first 2 hours of bulk fermentation. To do the folds, use wet hands, take one edge of the dough and gently stretch it upwards and then fold it over towards the centre of the dough.
- Bulk fermentation is the stage in bread making where the dough undergoes its primary fermentation, allowing it to rise and develop flavour, structure, and texture before shaping.
- Fold: Rotate the dough 90 degrees and repeat the stretching process with the newly exposed edge, folding it over towards the centre.
- Repeat: Continue this process of stretching and folding the dough from all four sides, rotating the dough after each fold, until you have completed a full cycle.
- Divide the Dough: Using a bench scraper or a sharp knife, divide the dough into equal portions about 900g per piece.
- Shape Each Portion: Once divided, gently shape each portion of dough into a round ball or the desired shape, ensuring the surface is smooth and taut.
- Rest: Allow the divided portions of dough to rest for 20 minutes, to relax the gluten and make shaping easier.
- To shape the dough into its final form, gently flip it over onto the floured surface so the smooth side is facing down.
- Tighten: Using your hands, gently tighten the dough by folding the edges towards the centre, creating tension on the surface. This helps to strengthen the dough’s structure and promote a better rise during proofing and baking.
- Seal: Pinch the seams together to ensure a tight seal, creating a smooth surface on the bottom of the dough.
- Place Seam-Side Down: Once shaped, place the dough seam-side down onto a prepared baking tray or into a proofing basket lined with a cloth or parchment paper.
- Repeat: Repeat the shaping process with the remaining portion of dough, ensuring each is shaped into its final form.
- Final Proof: Place the dough in the fridge covered for 10-16 hours.
- Bake: Bake with steam at the beginning for 20 minutes at 450-485°F, then vent for 20 minutes.