Six summer crafts for kids

Looking for ways to keep your family entertained this summer? Try making one of our six summer crafts for kids! With the gorgeous weather on the way and many kids being overwhelmed with screen time, let’s look for other ways to stay entertained. And many of these crafts include learning moments from art and science inspired activities or learning more about where their food comes from.
This past spring, we paired with Canada’s Agriculture and Food Museum to bring students and kids across Ontario, Draw with Rob Canada.
Our Draw with Rob video series and supporting educator resources help curious kids learn about the science of agriculture through art. Each project is based on an exclusive Draw with Rob episode and includes subsequent art activities through which students will explore the themes of plant growth, soil health, farm technology and coding. Find the videos and matching educator resources here! Each educator resource came with a multitude of different crafts, we have compiled them into a list of six crafts that you can do with your kids at home! Visit the individual educator resources for more crafts specific to different ages.
Kids craft #1- Soybean sculpture
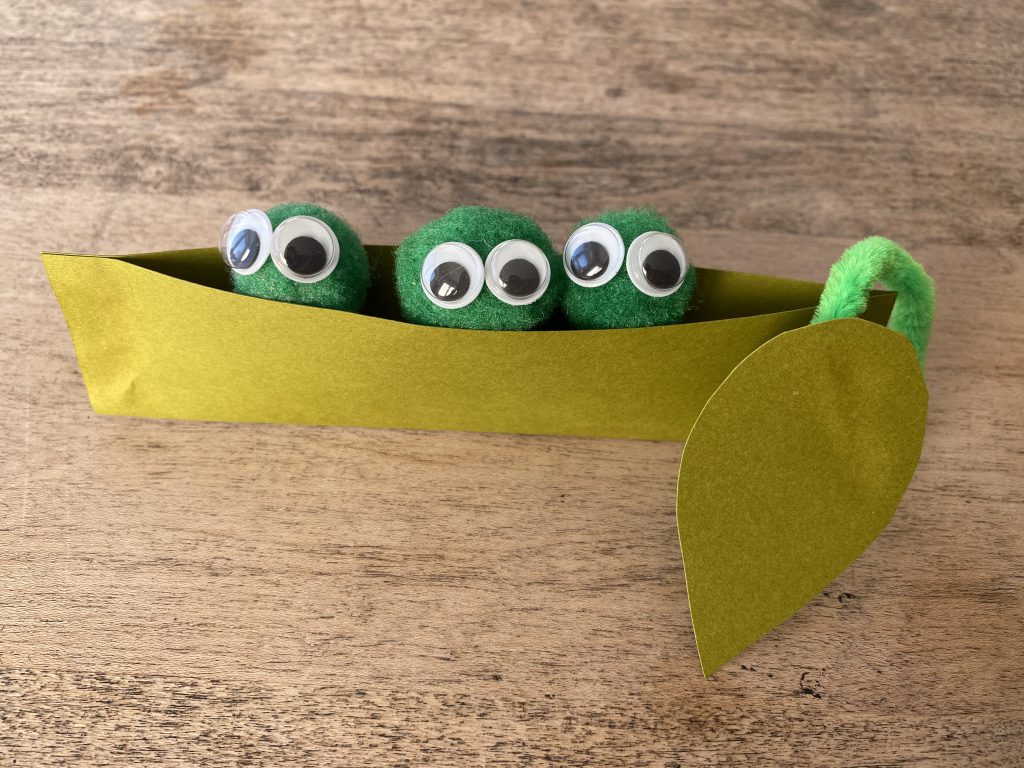
From the Magic Beans educator resource.
This fun craft will take around 45 minutes and it’s perfect for kids ages 5 to 8. Making a soybean sculpture helps to develop your child’s ability to repeat directions given to them and helps them to learn different forms through the hands-on creation of three-dimensional art. And, they learn how Ontario soybeans grow in bean pods through the summer months!
Materials:
- Green pipe cleaner
- Green material for pod (foam, felt or construction paper)
- Small green pompoms
- Googly eyes
- Scissors
- Glue/ stapler
Directions:
- Make the pod. Cut out strips (9 cm x 14 cm) of your green material. Fold it in half to create a long pod. Place a pipe cleaner down the centre of the strip with some of it extending beyond the pod to form the stem; glue It in place. Kids can cut out one or more leaves from the green material to glue or staple to the end of the stem. With the stem in place, glue the ends of the material together to create a pod (a staple in each end may make it more secure.)
- Create the beans. Decorate the pompoms to represent the beans. Kids can add wiggle eyes or draw eyes or facial features with a marker (like Rob!). Each child should create three to five “beans” for their pod. Glue the beans into the pod or leave them loose.
Kids craft #2- Bean mosaic
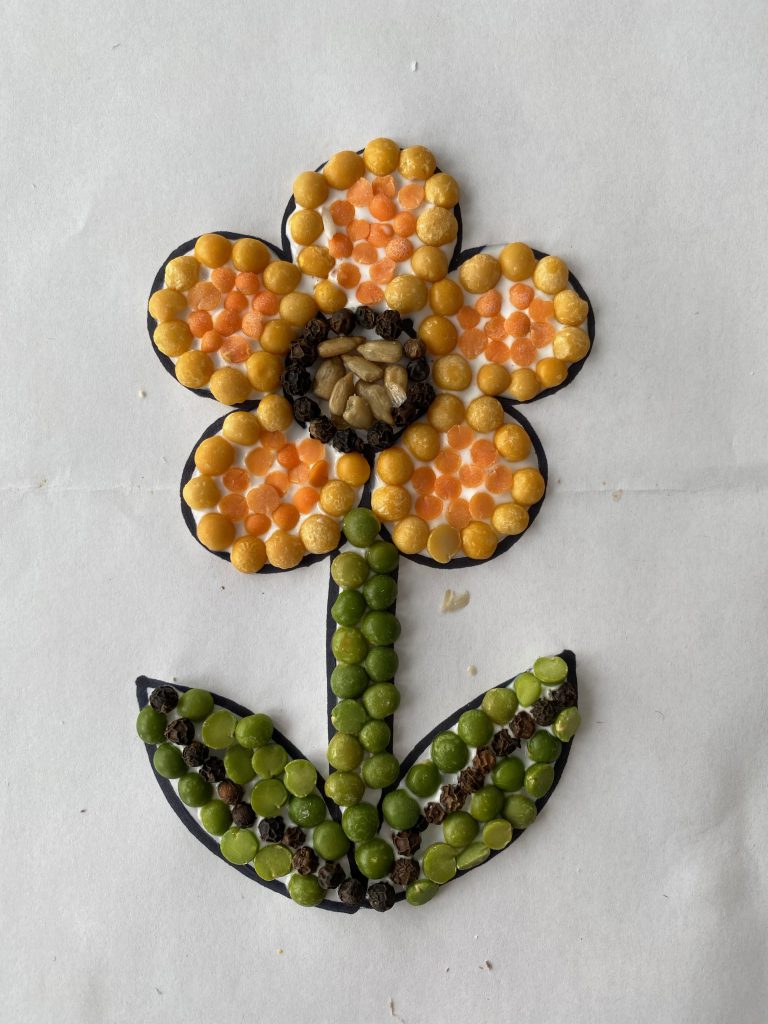
From the Magic Beans educator resource.
Using seeds and beans to create this fun mosaic helps to teach kids about assembling, texture, value and colour. This craft is recommended for kids ages 5-10 and will take approximately 45 minutes.
Materials:
- Templates printed onto card stock (print out pages 10 & 11 from Magic Beans educator resource pdf)
- White glue
- Soybeans
- Seeds and other beans
- Q-tips
Directions:
- Spend some time looking at the shape and colour of the soybeans. Show the other seeds and beans, noting the similarities and differences in size, shape, colour and texture.
- Distribute templates, glue, beans, and seeds . It helps to put the beans and seeds in paint palettes or empty egg cartons. Kids can fill the template design with beans and seeds to create the mosaic. The best way to apply the beans is to fill one section at a time with glue and spread it with a Q-tip. The beans should be applied to each section while the glue is wet. A thick layer of glue is required for the beans to stick well.
Kids craft #3- Grass gnomes
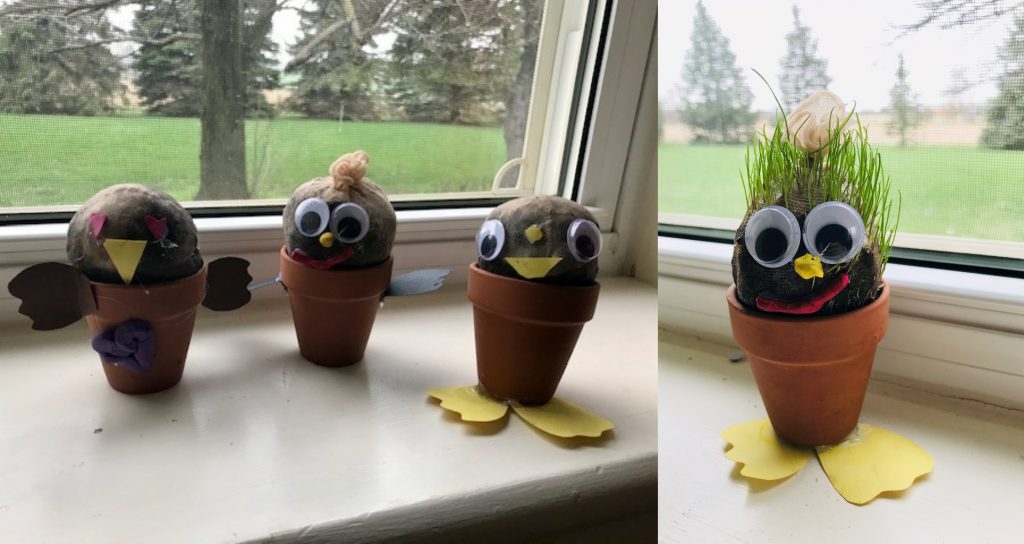
From the Wiggly Worm educator resource.
This extra-cute craft teaches kids about the importance of soil for plant growth and lets your kids develop their own characters with a unique personality or flare. This craft is recommended for kids ages 6 to 10 and will take 45 minutes to put together and another 10 days for the grass to grow!
Materials:
- Old knee-high nylons/hosiery
- Spoon
- Grass seeds
- Potting soil
- Googly eyes
- Felt or foam for making features
- Scissors
- Hot glue gun or waterproof glue
- Small flowerpots or recycled yogurt containers (1 per child)
- Small cups to fit into flower pots
- Shallow basin
- Water
Directions:
- Discuss soil. Have your kids examine the composition of the potting soil.
- Stretch a nylon over the mouth of a flowerpot. Put 1 spoon of seeds into the nylon + 2 handfuls of soil. Push to bottom.
- Remove; tie a knot close to the soil to make the head.
- Create a face on the seeded part. Encourage your kids to use features to give their gnomes character. Help with the glue; let dry.
- Invert the heads in the basin of water for 5 minutes to soak seeds.
- Decorate flowerpots while the heads soak.
- Insert a small cup into the flowerpot; add water to the cup.
- Push the gnome head, seed side up, into the cup. The dangling nylon will be a wick to keep the seeds moist.
- Place the gnomes by a sunny window.
- Maintain the water level in the cup. Grass “hair” sprouts within a week!
Kids craft #4- Prints and impressions
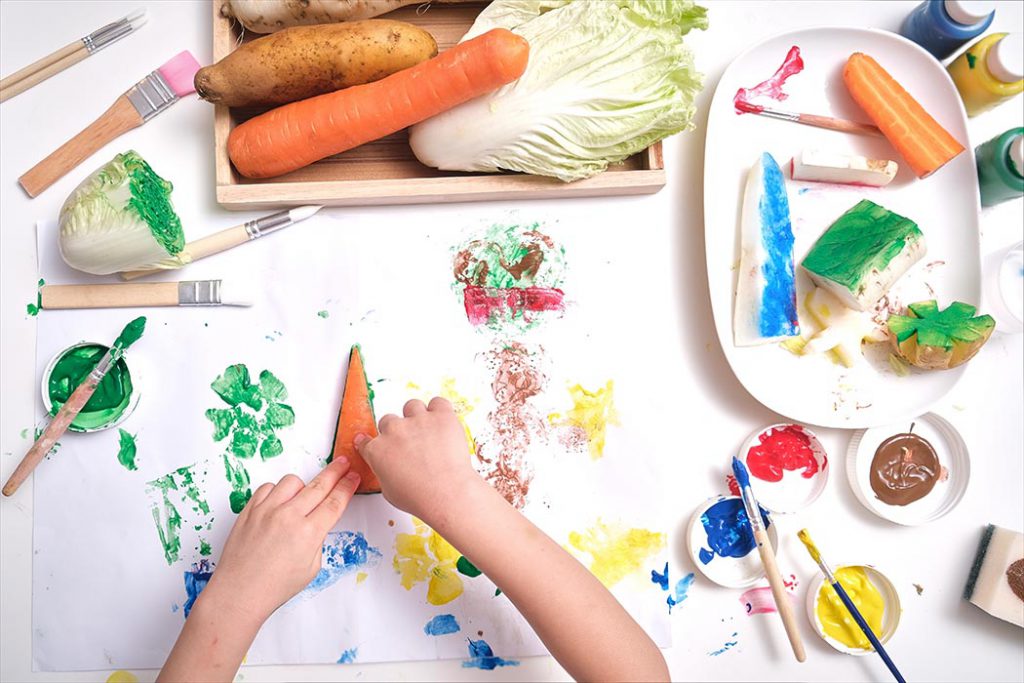
From the Tractors in Spaaaace educator resource.
This craft uses different objects to create patterns, prints and impressions. It is a valuable craft to help teach your kids about texture, variety and patterns. This craft is recommended for kids ages 6 to 7 and should take about 45 minutes.
Materials:
- Paper
- Acrylic paint
- Brushes
- Foams stamps
- Sponges
- Apples, potatoes and carrots
- Other objects that can be used to make stamps
Directions:
- Many artists create art with prints and impressions. View the art of Inuit print maker Leetia Alivaktuk.
- Explain print making; artists apply paint or ink to textured material and press it onto paper, fabric or canvas.
- Provide a variety of sponges stamps, hard fruits/ vegetables, erasers, rubber balls, etc. Apply paint to objects and use them to create prints on the paper. Kids can create a representational or an abstract piece of art.
- Once your kids have made prints, review the story of farm tire technology listed under resources on page 10 of the Tractors in Spaaaace educator resource and view images of the tractor tires. Talk about the patterns and whether they are for appearance or purpose, such as not getting stuck in the mud or reducing friction.
Kids craft #5- Soil collage
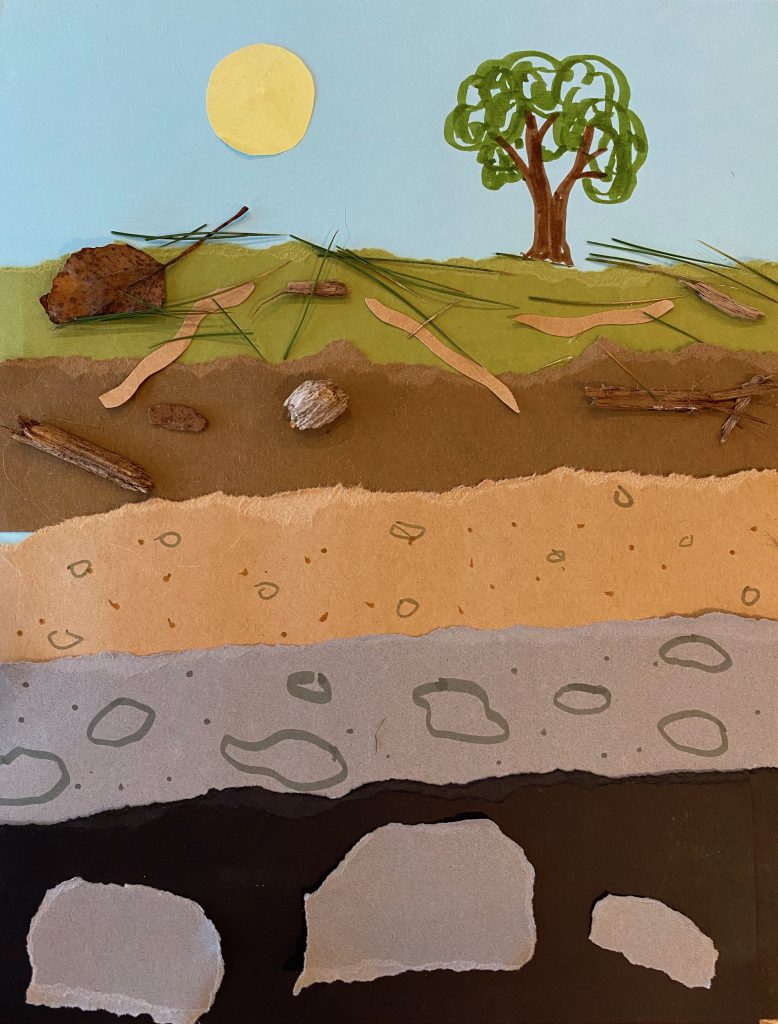
From the Wiggly Worm educator resource.
In this craft, kids will gather their very own materials to create a multi-layered masterpiece! While teaching kids about the different layers found in soil and developing their creative abilities, this craft is perfect for getting kids heavily involved in making their own, unique collage. This craft is recommended for kids ages 7 to 9 and should take approximately 45 minutes.
Materials:
- Construction paper (blue, black, grey, light brown, dark brown and green)
- Scissors
- Glue
- Natural materials (found outdoors)
- Markers and other drawing materials
Directions:
- Discuss soil layers. The collage will represent the elements of bedrock, parent material, subsoil, topsoil, humus.
- Create the layers. Use the blue construction paper as a background. Tear or cut strips of the other colours to represent the soil layers. Bottom to top: bedrock — black; parent material — grey; subsoil — light brown; topsoil — dark brown; humus — green.
- Use drawings and natural materials (found outdoors) to represent what is in each layer. Bedrock — large rocks; parent material — weathered rocks; subsoil — sand, silt, clay; topsoil — minerals, decaying matter, plant roots; humus — living and decaying material, plants, moss. Encourage students to be creative in what they add.
- Once collaged elements are included, add a scene to the top blue area with trees, flowers, insects, kids playing.
Kids craft #6- Negative Space
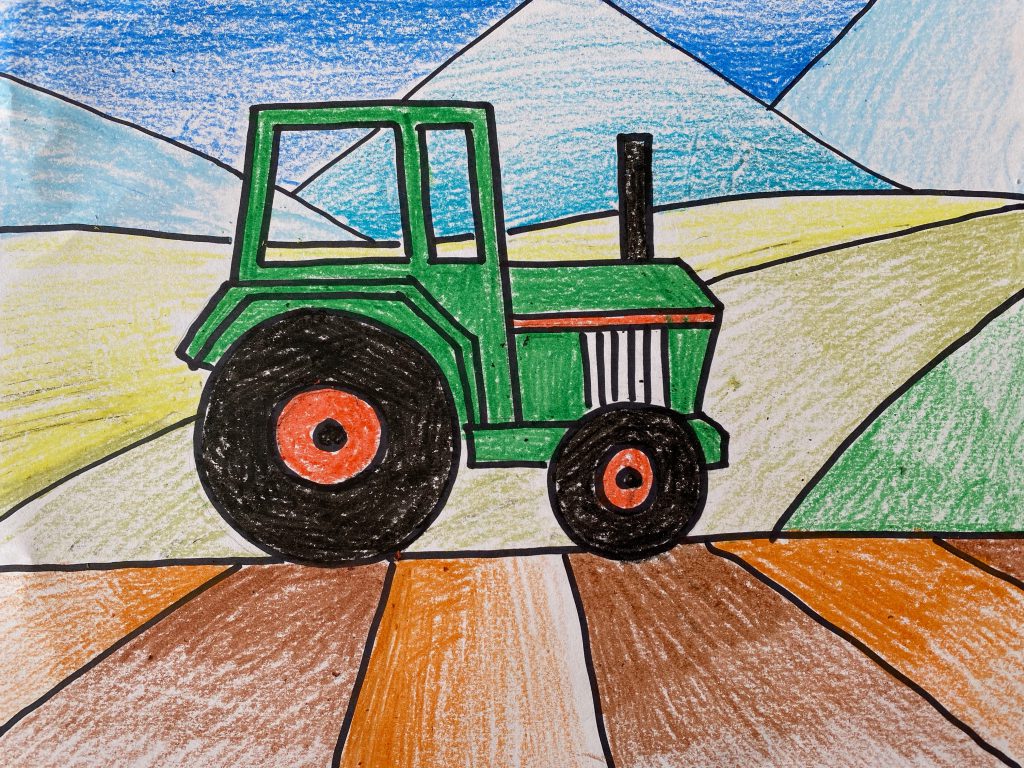
From the Tractors in Spaaaace educator resource.
In this craft, kids will draw their own tractor and create value area in negative space. The craft uses lines to separate positive and negative space, which helps to develop your child’s knowledge of the elements of design. This craft is recommended for kids ages 8 to 10 and may take approximately 45 minutes.
Materials:
- Drawing paper
- Pencils
- Colour media (crayons or pencil crayons)
- Images of Old Lumber Village by A.J. Casson
Directions:
- Begin with a discussion about positive and negative space. Show images of paintings, such as works by the Group of Seven of Emily Carr. Ask kids to identify positive and negative space.
- View Old Lumber Village by A.J. Casson. Ask kids what they notice about the negative space. Casson divides it with line, and then fills each space with various values (a cubist technique).
- Kids will draw a tractor, from a refence or their imagination. The tractor is the positive space. Everything around it is the negative space. Students can draw lines from the tractor extending to the edges of the page, as in the example, filling the negative space with interesting shapes. Each shape can be filled with value from dark to light and could represent crops or fields.